🕹️ Arduino-USB-HID-RetroJoystickAdapter 🕹️
What is this?
Very cheap and quite easy way to connect many non-USB joysticks and gamepads or DIY arcade cabinet controller to almost any machine with USB-port and HID-support. Arduino board with ATmega32u4 chip with help of Joystick-library does all the USB-work. Tested with Windows and Linux desktop computers and ARM based computers like Raspberry Pi and Orange Pi.
ATmega32u4 can be easily changed to act as keyboard and/or mouse too. With keyboard device it is easy to make adapter for many mobile devices which don't have gamepad-support out of box. I have tested it with Samsung Galaxy S4 Android phone and Samsung Galaxy Tab 10.1 Android tablet with OTG-USB cable.
Supported controllers
- Atari-joysticks (supports controllers with 2-fire buttons) ²: RetroJoystickAdapter_Atari.ino, hardware
- Sega Genesis / Megadrive controllers (3 and 6-button versions) ²: RetroJoystickAdapter_Megadrive.ino, hardware
- Sony Playstation with Analog and Multitap 4 controllers support: RetroJoystickAdapter_Playstation.ino, hardware
- Nintendo 64 controller ¹ (⚠️ 3.3V!): RetroJoystickAdapter_N64.ino, hardware
- Wii Nunchuck and Classic Controller (and maybe Pro, not tested) (⚠️ 3.3V!): RetroJoystickAdapter_WiiExtension.ino
- X-Arcade ²: hardware
- AT and PS/2 Keyboard to 4 joysticks: hardware
- Soarer's programmable AT and PS/2 adapter (works with X-arcade too): hardware
- Nintendo Entertainment System controllers (NES) ¹ ²: RetroJoystickAdapter.ino
- Super Nintendo controllers (SNES) ¹ ²: RetroJoystickAdapter.ino
- Simple one joystick two button Atari-joystick adapter made with Atmel Studio (should be very compatible): hardware
- C64 keyboard adapter for BMC64 made with Soarer's keyboard controller firmware: hardware
- (old, don't use: Atari-joysticks (supports Sega Master System controller with 2-fire buttons) (ATARI) ¹ ²)
- (old, don't use: Sony Playstation 1/2 controllers (doesn't support Dualshock or analog features) (PSX) ¹ ²)
¹ = needs Joystick-library
² = 2 controllers supported
If you use Linux and want to get more than 1 controller with one Arduino, check "Linux and more than one controller with one Arduino"-topic in this same page.
Short version
- Get ATmega32u4 Arduino board
- Connect joystick or gamepad to Arduino (in most situations soldering is required)
- Install Arduino IDE
- Install Joystick library (if needed)
- Open sourcecode to Arduino IDE and select controller by commenting and uncommenting and edit pin-numbers (if needed)
- Upload
- Done
Long version
What you need
Arduino board
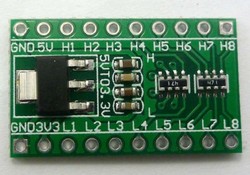
Starting point is ATmega32u4 based Arduino board. There is two versions of ATmega32u4, IO-logic with 5V or 3.3V. Many controllers (like basic Atari-controller) doesn't include any logic, so 5V and 3.3V versions are fine. Most of controllers with some logic needs 5V (NES, SNES, Genesis) and some rare ones needs 3.3V (N64/Gamecube) (5V is 16MHz and 3.3V 8MHz, so timings are different and 16MHz code doesn't work for N64/Gamecube with 3.3V version). Make sure that Arduino includes USB-port. There are some versions which doesn't include USB-port and then you have to add USB-connector for it. Arduino Leonardo includes ATmega32u4, but cheapest and smallest ones are named Pro Micro. Arduino Pro Micro and ATmega32u4 are good words to use when searching from Ebay etc. Cheapest starts from about $4.
Computer with Arduino IDE
Arduino IDE works with Windows, OS X and Linux and ARM (beta). If you use small card computer like Rasperry Pi or Orange Pi, you can program adapter even with them (tested with Orange Pi PC and RetrOrangePi 2.0). That way you don't even have to unplug adapter from your emulator/game-platform if you want reprogram adapter.
Joystick library for Arduino IDE
https://github.com/MHeironimus/ArduinoJoystickLibrary/tree/version-1.0 (note that only version-1.0 works. version-2.0 is incompatible)
Joystick(s) or gamepad(s) and way to connect them to Arduino
Some joystick/gamepads uses their own connectors and original connectors can be very pricey. Sometimes you can find extension cord cheaper than plain connector and you can take cable and plug from that. You can use any IO-pins, but try to avoid pins 0 and 1. They are serial port TX and RX pins and even though they are not used right now, they are handy for debugging and other uses.
⚙️ Setup
-
Download and install Arduino IDE: https://www.arduino.cc/en/Main/Software
-
Tools->Board->Arduino LeonardoIn Arduino IDE you have to select board. In my case some reason "Arduino Leonardo" selections works better than "Arduino/Genuino Micro". With Leonardo-setting RX and TX leds are normally off and blinks when data is transferred to/from USB. With Micro-setting LED's are normally on and they blinks to off when data is transferring. Connect now your board ATmega32u4 through USB, the RX and TX leds should blink (if not, try another USB port).
-
Tools->Port->COMxArduino IDE shows available COM-ports. In most cases it's biggest numbered COM-port. COM-port number can change when you start to upload program first time (COM-port number can be different after joystick-features are enabled). If this happens, just change COM-port and start upload again. When I tested with RetrOrangePi (Armbian Linux), port was
/dev/ttyACM0. In Windows environment, do not use any USB HUB, it may interfere with the comunication with ATmega32u4 board. -
Test your programming environment and upload
You can now test your setup. One basic example is "blink". With this board, it doesn't blink, because there is no led in pin 13. Nevertheless you can use it as a test that your IDE and Arduino works. Select
File -> Examples -> 01.Basics -> Blinkand pressUpload(Arrow to right -symbol top of code windows). If you get no errors, you are good to go. -
Install joystick library (needed only with some controllers - check list at top of this page)
Go to https://github.com/MHeironimus/ArduinoJoystickLibrary/tree/version-1.0 and press
Clone or download -> Download ZIP. ExtractJoystick2folder from zip to%HOMEPATH%\Documents\Arduino\libraries(Windows),~/Arduino/libraries(Linux) or~/Library/Arduino15/libraries(MacOS).After extraction check that you have files
%HOMEPATH%\Documents\Arduino\libraries\Joystick2\Joystick2.h and Joystick2.cpp,~/Arduino/libraries/Joystick2/Joystick2.h and Joystick2.cppor~/Library/Arduino15/libraries/Joystick2/Joystick2.h and Joystick2.cpp.Playstation analog controller
RetroJoystickAdapter_PlaystationAnalog.inoneedsJoystick\Joystick.handJoystick\Joystick.cpp. -
Close and start Arduino IDE again so it searches and finds library.
-
Load
RetroJoystickAdapter.inoto Arduino IDE (check right filename from list at top of this page)Select controller by commenting and uncommenting and edit pin-numbers (if needed).
-
Press Upload
-
If you got the message "all done" and no errors, your done here.
🎉 Time to Enjoy
You can test the joystick with this website : https://hardwaretester.com/gamepad. It works with any modern browser.
MS Windows
You should go now to Control Panel -> All Control Panel Items > Devices and Printers (some Windows versions in Game Controllers) and try to find Arduino Leonardo device. Right click on Gamepad controller definitions > double click in one of the options (1st is the controller one, and the 2nd is the controller two) and you can now test the buttons.
⚠️ Notice With Windows!
If you move adapter to other Windows machine, you may have to install the arduino drivers. To have the last updated ones, just download the file Windows ZIP file for non admin install from the page https://www.arduino.cc/en/Main/Software. After the download, unzip the folder. Go to the Computer > right click > Manage > Device Manager > Unknown devices > right click > Update Driver Software > Browse my computer for software > Browse... > and try to find the folder \arduino-1.6.xx\drivers inside the folder you unziped before. Click Next and Windows should install the driver. Arduino would apper as the name Arduino Leonardo inside Ports (COM and LPT) with an associated COM port (like COM9 for example).
Linux
Just connect, open your command line and test whit jstest /dev/input/js0.
⚠️ Notice With Linux!
Linux usbhid-module doesn't support out of box multiple controllers with one USB without USB-hub-features.
You have to give parameter
quirks=0x2341:0x8036:0x40 (first numbers are VID and PID of Arduino) to usbhid-module.
Here is example how to do it with RetrOrangePi 2.5.2:
- Make backup of
/boot/boot-retro.cmdand/boot/boot.scr - Edit
/boot/boot-retro.cmdsetenv bootargs -line and addusbhid.quirks=0x2341:0x8036:0x40to kernel parameters. sudo mkimage -C none -A arm -T script -d /boot/boot-retro.cmd /boot/boot.scr- Reboot
- Check with
cat /proc/cmdline
Lakka 2.0:
- Remount r/w:
mount -o rw,remount /flash - Make backup:
cp /flash/boot.scr /flash/org.boot.scr - Make file
/flash/boot.cmd:
setenv machid 1029
setenv bootm_boot_mode sec
setenv bootargs console=ttyS0,115200 boot=/dev/mmcblk0p1 disk=/dev/mmcblk0p2 consoleblank=0 usbhid.quirks=0x2341:0x8036:0x40
fatload mmc 0 0x43000000 script.bin
fatload mmc 0 0x42000000 KERNEL
bootm 0x42000000
mkimage -C none -A arm -O u-boot -T script -n "Lakka Boot" -d /flash/boot.cmd /flash/boot.scr
- (you need to get mkimage from somewhere (e.g. use Armbian), because it is not included in Lakka)
- Reboot
- Check with
cat /proc/cmdline
Tutorial
There is simple tutorial in Tutorial folder. We tried to make it as clear as possible, so even if you are not familiar with coding, you may can do modifications to it (example add a button).
Misc
Changing VID/PID so Windows and Linux works without drivers or quirks
Linux problem with multiple controllers are solved with changing VID and PID to something that already has HID_QUIRK_MULTI_INPUT (0x40) activated in kernel.
Here you can see what quirks are activated to different VID/PIDs:
https://github.com/torvalds/linux/blob/master/drivers/hid/usbhid/hid-quirks.c
In these instructions, USB_VENDOR_ID_MOJO=0x8282, USB_DEVICE_ID_RETRO_ADAPTER=0x3201 are used.
Edit C:\Program Files (x86)\Arduino\hardware\arduino\avr\boards.txt (update 26.7.2022: C:\Users\[USER]\AppData\Local\Arduino15\packages\arduino\hardware\avr\1.8.5) or in linux arduino-x.x.xx/hardware/arduino/avr/boards.txt (close Arduino IDE before editing):
# leonardo.build.vid=0x2341
# leonardo.build.pid=0x8036
leonardo.build.vid=0x8282
leonardo.build.pid=0x3201
# leonardo.build.usb_product="Arduino Leonardo"
leonardo.build.usb_product="Retro Joystick Adapter"
Warning
There is possibility that serial port is not recognized after VID/PID change. We have tested with two Windows 10 machine and Linux with no problems. If you "brick" your Arduino, you get it back to life with resetting it rapidly two times in a row (grab a wire and make a shunt with RST->GND, they are located between A3, VCC and RAW) and then upload sketch (example blink.ino) with normal Arduino VID/PID. Be quick, because you have only 8 seconds to start uploading (try to hit
Sendbutton before make the reset).
Changing number of buttons in joystick-library
If you want that less than 16 buttons are shown in joystick-settings, edit Joystick.cpp/Joystick2.cpp/Joystick3.cpp "USAGE_MAXIMUM"-line (0x10 = 16). You may to have create new project after that, because all libraries are not recompiled every time and we don't know how to force full recompile.
Menu for multiple adapter names
Adapter shows as "Arduino Leonardo", but if you want it to show some other name, edit C:\Program Files (x86)\Arduino\hardware\arduino\avr\boards.txt (update 26.7.2022: C:\Users\[USER]\AppData\Local\Arduino15\packages\arduino\hardware\avr\1.8.5). You can even add sub menu to tools-menu by adding these lines (after editing boards.txt, you have to close and reopen Arduino IDE):
menu.usb_name=USB Product Name
leonardo.menu.usb_name.leonardo="Leonardo"
leonardo.menu.usb_name.leonardo.build.usb_product="Arduino Leonardo"
leonardo.menu.usb_name.leonardo_1="Genesis 6"
leonardo.menu.usb_name.leonardo_1.build.usb_product="Genesis 6-button adapter"
leonardo.menu.usb_name.leonardo_2="Genesis 3"
leonardo.menu.usb_name.leonardo_2.build.usb_product="Genesis 3-button adapter"
leonardo.menu.usb_name.leonardo_3="NES"
leonardo.menu.usb_name.leonardo_3.build.usb_product="NES-adapter"
leonardo.menu.usb_name.leonardo_4="SNES"
leonardo.menu.usb_name.leonardo_4.build.usb_product="SNES-adapter"
New board to Arduino IDE
If you add new board to Arduino IDE, it survives from Arduino IDE updates. Copy boards.txt to {sketchbook folder}\hardware\retroadapter\avr\.
Restart Arduino IDE and select Tools -> Board -> Arduino Pro Micro Retroadapter.
It changes VID to 0x8282 and PID to 0x3201: Arduino Retroadapter
Arduino Uno R3
Arduino UNO R3 includes ATmega16u2 (along with ATmega328p) and it can be used too, but it needs some extra work (code doesn't work without modifications with UNO): https://github.com/NicoHood/HoodLoader2
Software USB
USB-device without ATmega16u2/32u4. Needs 3 resistors and 2 zener diodes.
https://www.obdev.at/products/vusb/index.html
PS/2
PS/2-keyboard can be connected directly to Arduino and there is library for that.
http://playground.arduino.cc/Main/PS2Keyboard
USB host
You can also use Arduino vice versa. You cannot read USB with normal Arduino, but there is shields to make Arduino as USB host. With that you can connect modern USB-joysticks and gamepads to old consoles.
https://github.com/felis/USB_Host_Shield_2.0
Level shifting and voltage levels
Converter
Very handy level converter with 3.3V AMS1117 regulator. Search from Ebay with Logic Level Converter Module AMS1117 DC 5V to 3.3V
Playstation, 3.3V, 3.7V or 5V?
There is contradictory data about Playstation controller voltages. I have one commercial adapter and it's 5V. I haven't measured official Playstation, but it is probably 3.3V.
Wii extension controllers
Wii extensions are 3.3V, but I have used Wii Nunchuck and Classic Controller with 5V (VCC and signals) without problems.
Konami code
You can also enable or disable Konami-code-shortcut with some controllers. For now it works only with Genesis 6-button controller (X+Y+Z+UP (or DOWN)), SNES-controller (X+Y+R1+UP (or DOWN)) and PSX-controller (rectangle+circle+triangle+UP (or DOWN)). "UP"-version is normal and "DOWN"-version swaps A and B. Some games demands that not other buttons are pressed before code and that's why only last pressed button can be button which have some function in emulator.
Other ideas
Of course Arduino can be used many other ways. Add a PIR motion detector module from Ebay (under $2) and your computer wakes up from sleep when you walk to room. Just read PIR-sensor data pin and if it is 1, send some keyboard button (which normally does nothing) to computer so it wakes up. Or make info-board to your kitchen or hallway wall from old Android tablet and it turns on backlight only when someone goes to kitchen.
🔗 Links
- Arduino: http://playground.arduino.cc/Main/InterfacingWithHardware
- NES: http://www.mit.edu/~tarvizo/nes-controller.html
- SNES:
- Sega Megadrive / Genesis:
- Playstation:
- Playstation Dualshock: https://gist.github.com/scanlime/5042071
- Nintendo 64 / Gamecube:
- Wii Classic Controller:
- Gamecube / N64:
- PC Engine/Turbografx (I don't have this controller, so it is not implemented, but it should be implemented very easily): https://emu-docs.org/PC%20Engine/tg16cont.html
- MSX: https://www.msx.org/wiki/Joystick_control
- How to reset Arduino (in case of emergency): https://learn.sparkfun.com/tutorials/pro-micro--fio-v3-hookup-guide/troubleshooting-and-faq#ts-revive
- C64 Mini: https://www.tsb.space/projects/c64-mini-arcade2usb-converter